

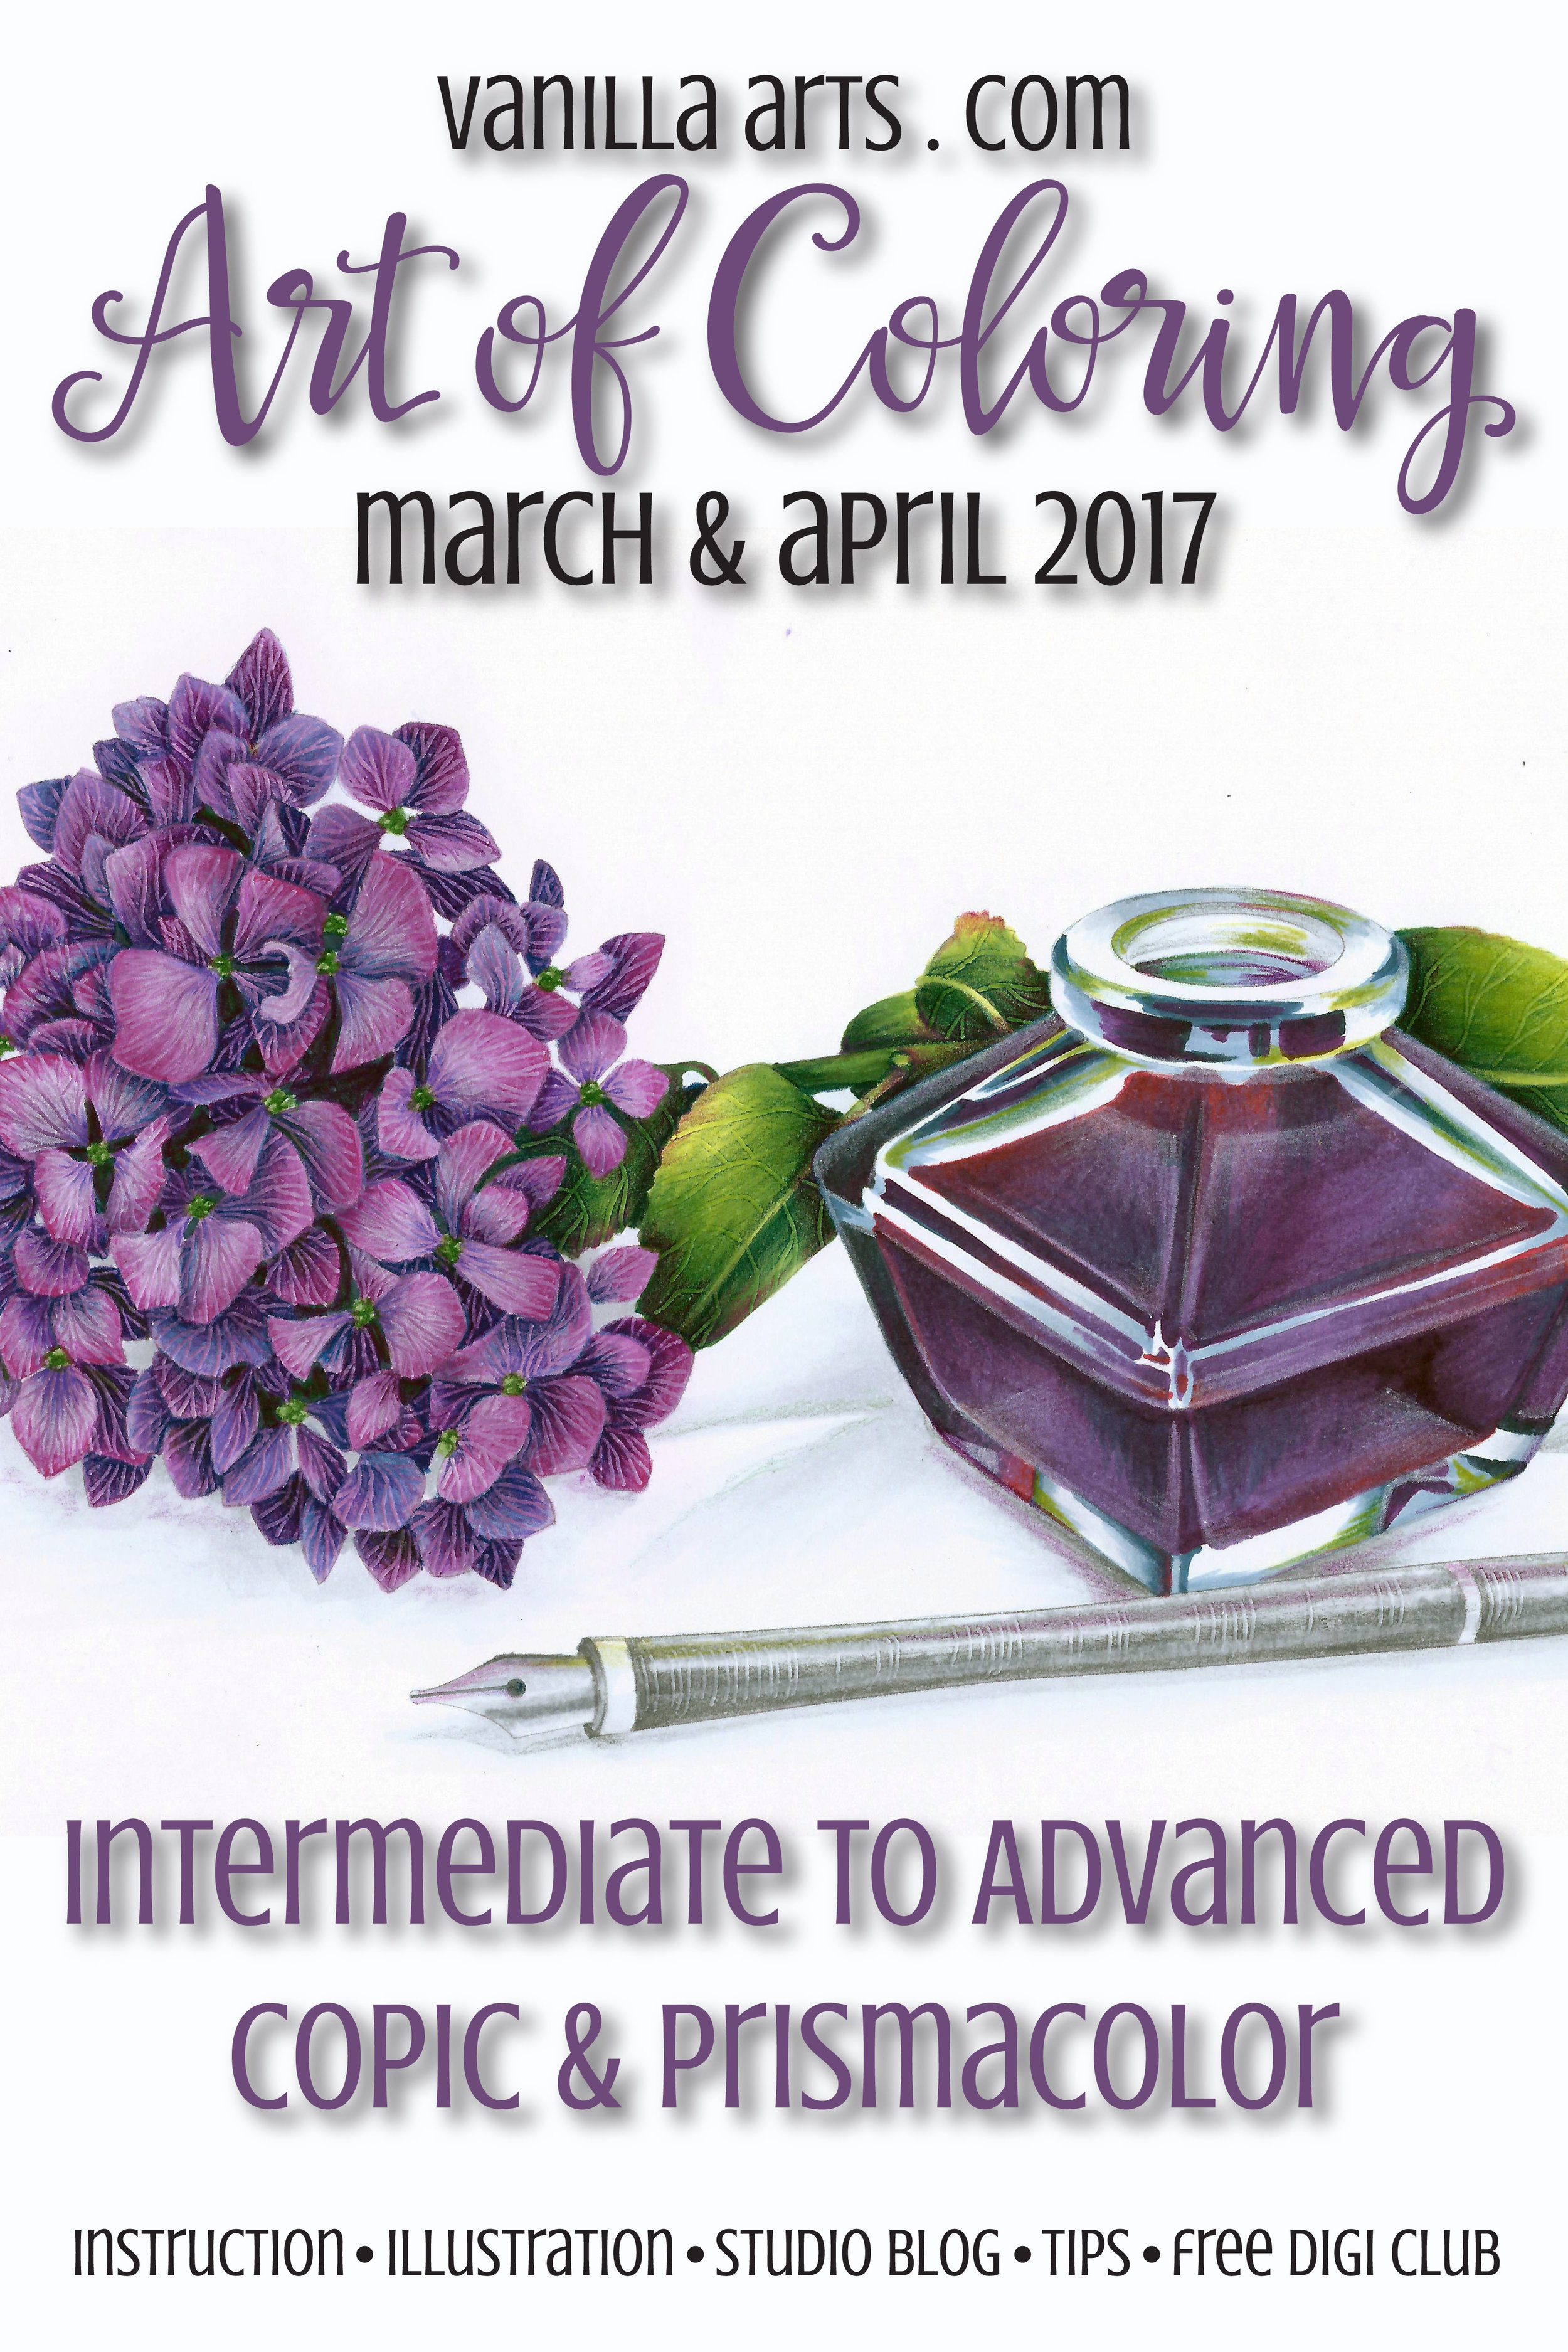
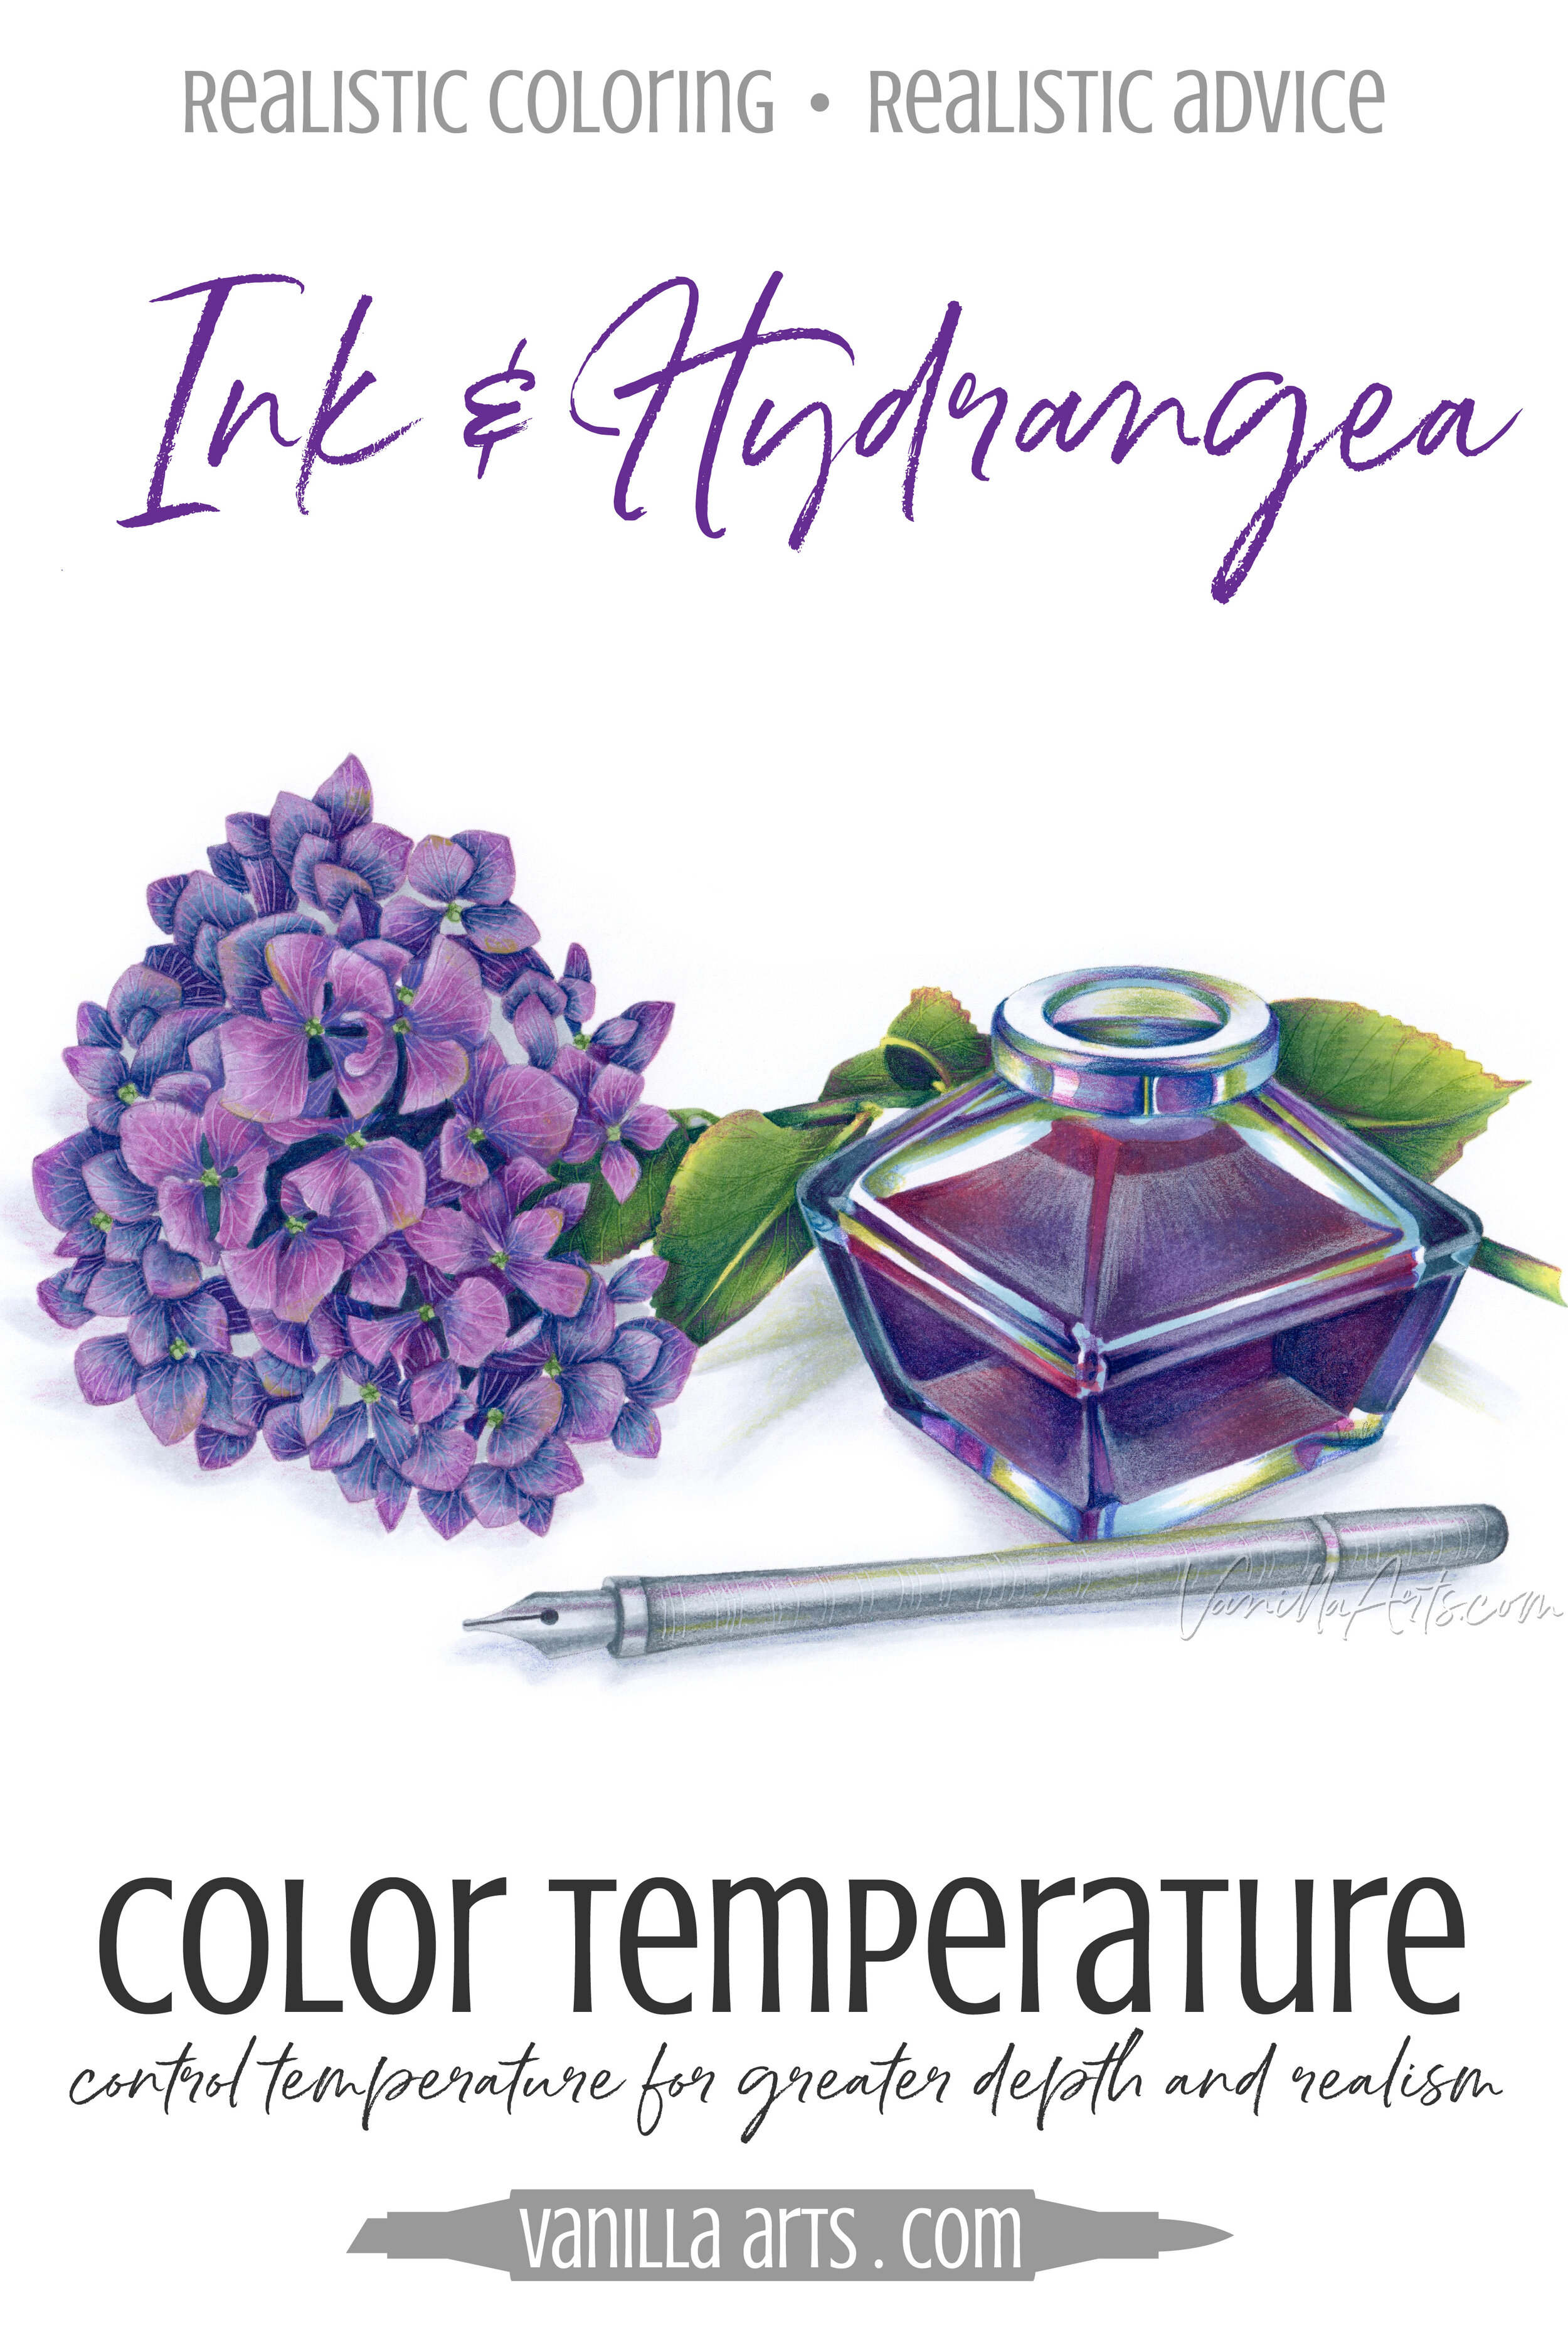
Color Shifting: Create Dimension with Temperature
Color shifting
Ink & Hydrangea is now a Marker Painting Workshop! Learn how to color with greater realism and to control your markers rather than letting them control you!
Amy shows you the theory behind color shifting for depth and the use of temperature to indicate distance.